These ovens cook using multiple forms of heat- conduction, radiant, and direct heat. Add some steam, and you get some seriously fabulous crust on your bread. Pizza? You better believe it. You cook it at an ideal 700 degrees Fahrenheit; a thin-crust pizza is done after only 3 minutes, emerging bubbling and with a lovely smoky flavor.
Cook anything in this that you would in a regular oven. And when it's cooled down, it can remain the ideal temperature for incubating yogurt, clear through the night.
This type of oven has the fire built on the cooking floor. Fill the oven with wood, light it, and let it burn for 2-4 hours, until the oven walls glow white-hot. My thermometer doesn't measure high enough to know how hot this is; it only measures to about 1400 degrees!
Scrape out the fire, quickly scrub off the oven floor, and let the heat "soak"- you're letting the temperature equalize all over the interior. When the temperature has dropped to what you want, add some steam (for bread baking) by swabbing the oven floor with a wet cloth or mop. Load it up with your bread, or turkey, or squash, potatoes, casserole, or whatever-- and close the oven door to bake.
It's called an earth oven because it's made using packed earth; in other words, mud. This makes it very affordable! I highly recommend Kiko Denzer's book, Build Your Own Earth Oven. It was invaluable to me, and has many excellent suggestions for making do with what you have locally. He also has a great overview on Mother Earth News, right here.
You can make a fabulous oven out of nothing but dirt, sand, chopped hay or leaves, and some bricks or tiles. There are even simpler versions around, using just rocks and dirt.
Since I opted for several upgrades on this oven, it cost about $200 total.
Items I got for free:
cinderblocks (a stack was in the yard when we bought the house)
sand (huge sandbox, in the photos' background)
bricks for the oven face
Items purchased included:
bags of cement for a foundation pad
rebar for reinforcing the foundation
rebar for reinforcing the cinder blocks
cement for reinforcing cinder block construction
one used steel entry door
one circular saw blade to cut the steel entry door
about 45 firebricks
1/2 cubic yard of dirt
a couple small buckets of refractory cement
portland cement and a bag of vermiculite, for the insulation layer.
12" of 1" diameter steel electrical duct tubing
one dial-gauge thermometer
mortar, used with the oven face, and some gaps in the cinderblocks
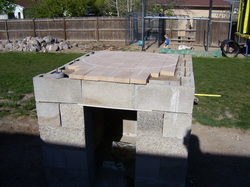
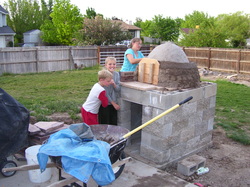
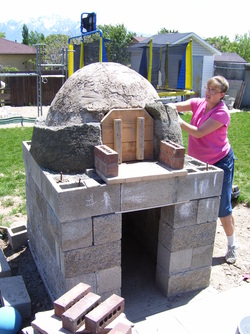
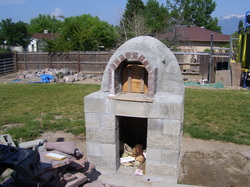
If the pictures below seem overwhelming, here are the steps in short form- prepare an insulated base for the oven; build a sand dome on it; pack moist earth all around the dome (thermal layer); pack insulation around the thermal layer. Finish with a breatheable plaster, for longest-lasting results. The doorway can be molded in as you go, or carved out afterwards.
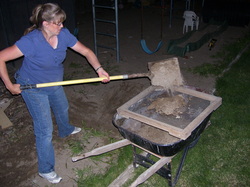
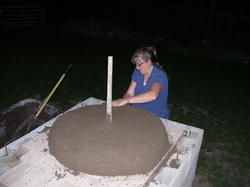
The pipe in the middle was to show my required finished height. Pack the sand really well, or it won't support the weight you're about to put on it.
TIP: this takes a TON of sand, which you'll have to scoop out later. At about this point I started added cinderblocks and other large items to the dome. That saved a lot of scooping. And sifting.
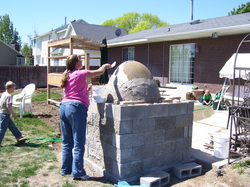
If you want a layer of refractory cement, to help hold heat and protect the inside walls, add it now. A thin layer, 1/8 - 1/4 " thick, is all you need.
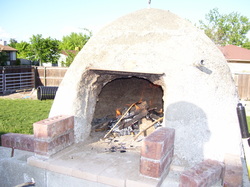
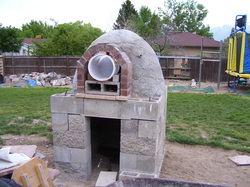
The pipe sticking out in front of my face is a piece of metal conduit with a fitting to screw on the temperature gauge. Next time I'll put it down close to the oven floor, which is where the bread bakes. There's actually about 100-degree (Fahrenheit) difference between the oven floor and where the oven probe sits.
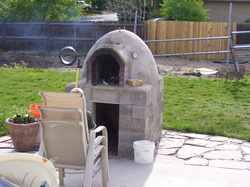
When using the oven, keep a bucket of water handy.
I still intend to make a roof for it- Utah winters are rough on it. There are two eye bolts embedded in the top of the oven- all it will take is a piece of sheet metal, creased at the center to make a sloping roof, and two slits cut in it to slip over the eye bolts. Twist them, and it should stay on.
 RSS Feed